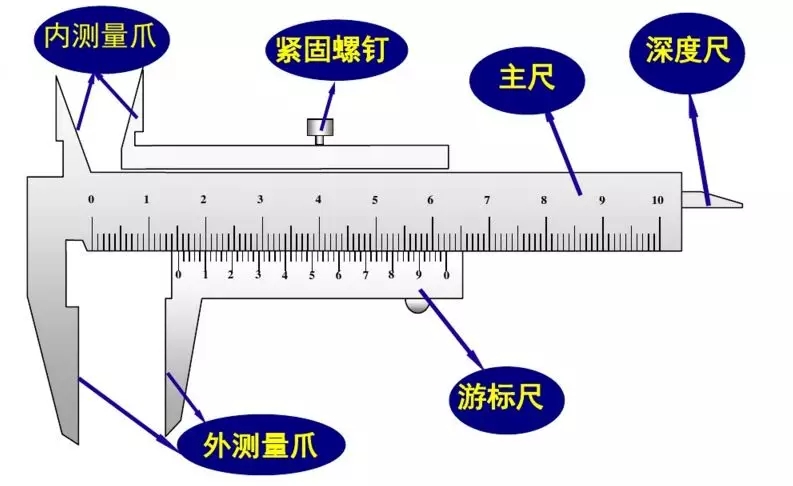
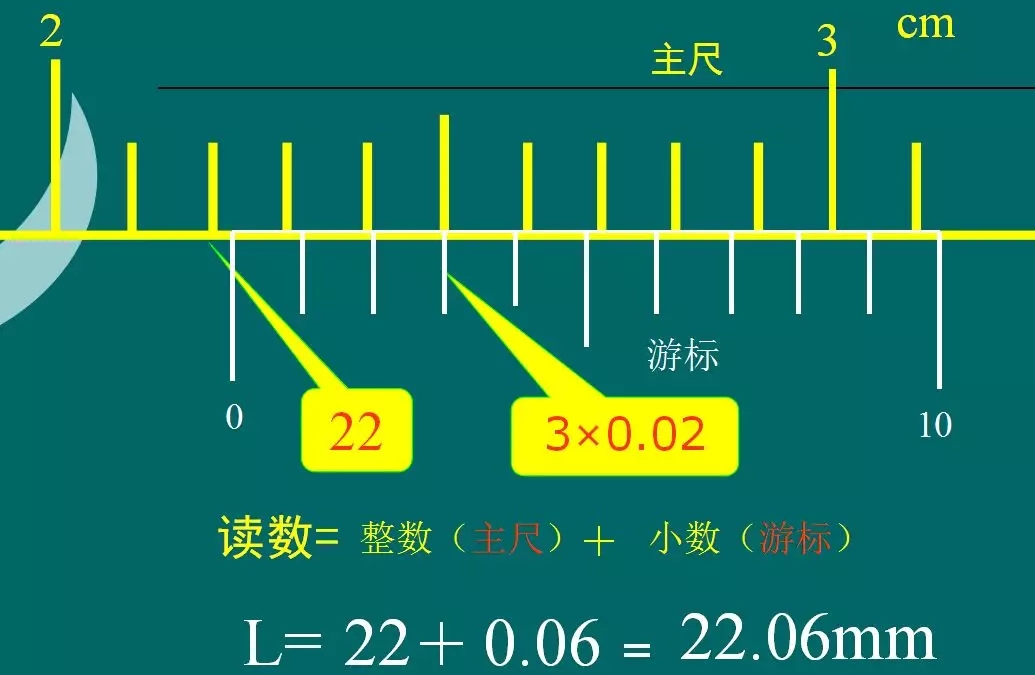
As a widely used high precision measuring tool, the vernier caliper is made up of two parts of the main ruler and the cursor that can slide on the main ruler. Is there a vernier caliper is seen helplessly feeling, today, we will talk about reading method of vernier caliper.
Vernier caliper and reading method

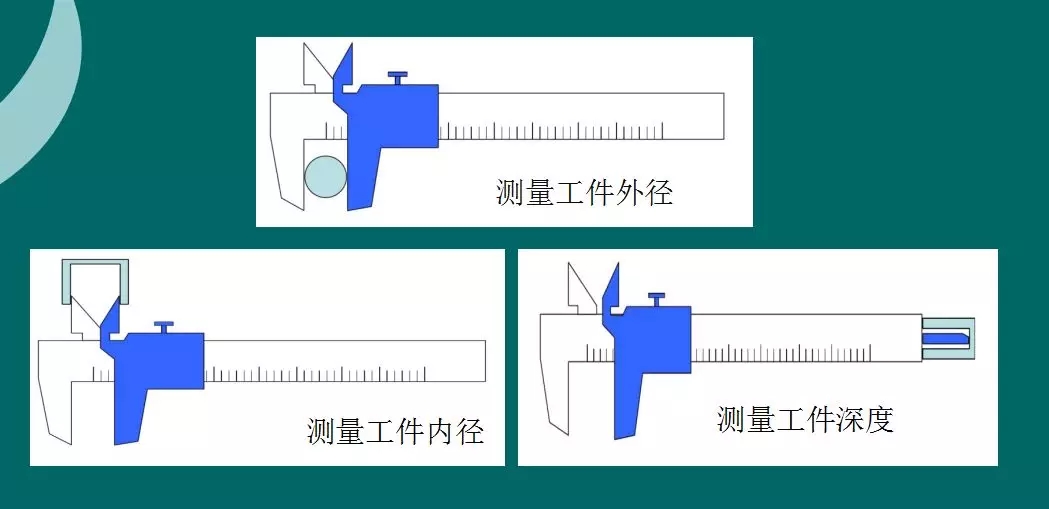
The function of the vernier caliper: it is convenient to measure the outer diameter, the inner diameter and the depth.

Vernier calipers are generally divided into 10 divisions, 20 degrees and 50 degrees. Three, 10 degrees of vernier calipers can be accurate to 0.1mm, 20 degrees of vernier calipers can be accurate to 0.05mm, and 50 degrees of vernier calipers can be accurate to 0.02mm.
Reading method

1. To determine the accuracy of the total scale of the vernier scale (10 degrees, 20 degrees, and 50 degrees)
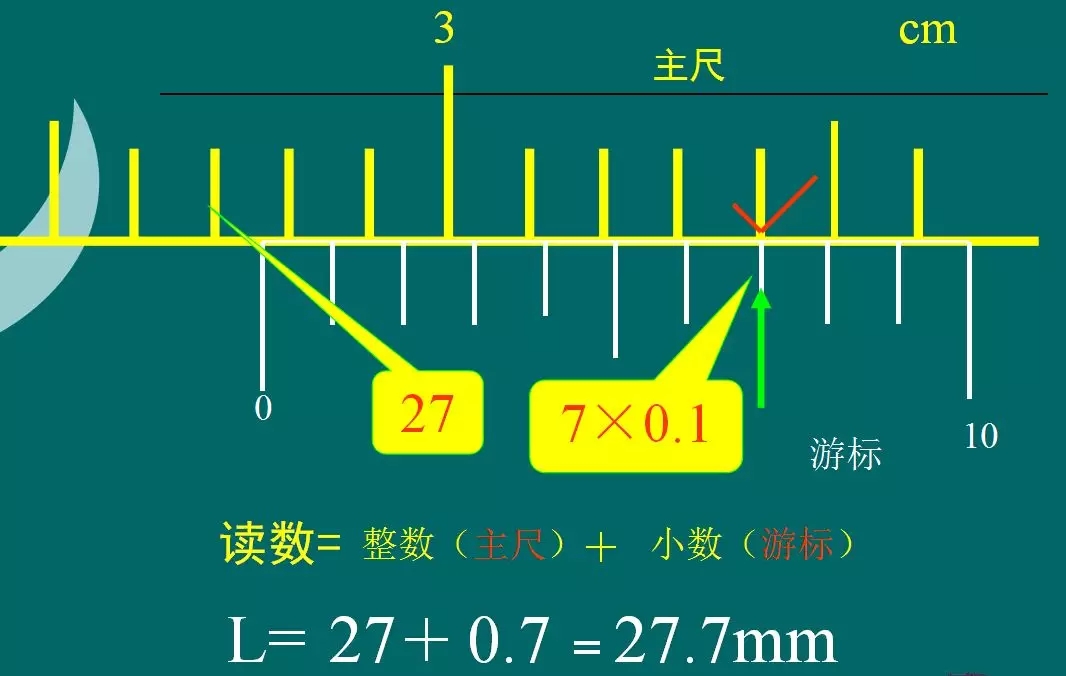
2, read the whole millimeter number (X) of the main ruler on the left side of the scale zero scale line.
3, find out the vernier scale and the main ruler scale line &ldquo, and the location of &rdquo, and read the N from the alignment line to the zero scale line on the vernier scale.
4. Read the measured values according to the reading formula.
Reading formula:
Measurement value (L) = main ruler reading (X) + vernier readings (n× precision)
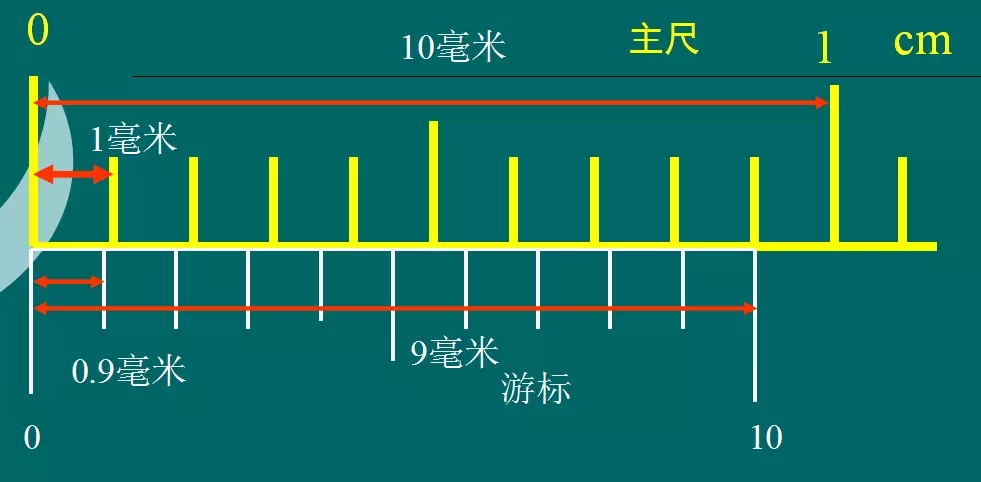
10 indexing vernier caliper

The smallest division on the ruler is 1mm. There are 10 equal degrees on the vernier, the total length is 9mm on the ruler, and every score on the vernier is 0.9mm, and a scale on the main ruler is different from that on the cursor on 0.1mm.

Note: if the number behind the decimal point is 0, it can not be omitted and the accuracy is expressed.
50 indexing vernier caliper

The smallest scale of the main ruler is 1 mm, and the vernier ruler has 50 small equaled scales, the total length of them is equal to 49 mm, so the difference between the vernier's scale and the minimum scale of the main ruler is 0.02 mm.

[cautions]
The 1. vernier caliper is a relatively precise measuring tool. It should be light and light, not to collide or fall underground. Do not use to measure rough objects in use, so as not to damage the amount of claw, and should be placed in a dry place to prevent corrosion.
2. when measuring, the fastening screws should be loosened first, and the moving cursor cannot be too strong. The contact between the two claws and the objects to be measured should not be too tight. It is not possible to move the clamped object in the claw.
When 3. reading, the line of sight should be perpendicular to the ulnar surface. If a fixed reading is needed, the cursor can be fixed on the ruler with a fastening screw to prevent sliding.
4. in actual measurement, several times should be measured on the same length, and the average value is taken to eliminate the accidental error.
